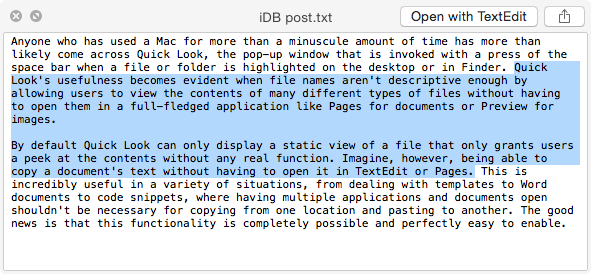
Anyone who has used a Mac for more than a minuscule amount of time has more than likely come across Quick Look, the pop-up window that is invoked with a press of the space bar when a file or folder is highlighted on the desktop or in Finder. Quick Look’s usefulness becomes evident when file names aren’t descriptive enough by allowing users to view the contents of many different types of files without having to open them in a full-fledged application like Pages for documents or Preview for images.
By default Quick Look can only display a static view of a file that only grants users a peek at the contents without any real function. Imagine, however, being able to copy a document’s text without having to open it in TextEdit or Pages. This is incredibly useful in a variety of situations, from dealing with templates to Word documents to code snippets, where having multiple applications and documents opened shouldn’t be necessary for copying from one location and pasting to another. The good news is that this functionality is completely possible and perfectly easy to enable.
How to select text in Quick Look on Mac
Pre-requisite: In order for all of this to work, you must first disable System Integrity Protection on your Mac. Also know as “rootless,” this features adds a level of security to your machine. Learn how to disable System Integrity Protection.
Step 1: Open Terminal. This can be done by searching for “Terminal” in Spotlight or by locating it in the Applications folder. Your version of Terminal may look different from mine, and that’s ok.
Step 2: Enter the following command into Terminal and press enter:
defaults write com.apple.finder QLEnableTextSelection -bool true

Step 3: You should be able to highlight the contents of text documents at this point, but if not, typing killall Finder into Terminal and pressing enter or rebooting your Mac should fix the issue.
Reverting back
If you don’t like the results or want to switch back to the original settings for whatever reason, doing so is as simple as following the above steps but changing the latter part of the command from “true” to “false”. This simply means substituting the following command for the one in step 2:
defaults write com.apple.finder QLEnableTextSelection -bool false
And that’s all! Now, instead of having to open a file to get at its contents, you can simply press the space bar and select and copy text from Quick Look, making working in macOS a little bit more convenient.