Due to user errors, repetitive imports, or bugs, you might have multiple copies of images in your Mac’s Photos app. This tutorial shows you how to find and delete duplicate photos on your Mac to free up space and keep your Photo Library organized. All this for free!
Manually delete duplicate photos on Mac
This is something you already know. But if you’re new to Mac, here’s how you can find and delete duplicate images inside your Mac’s Photos app.
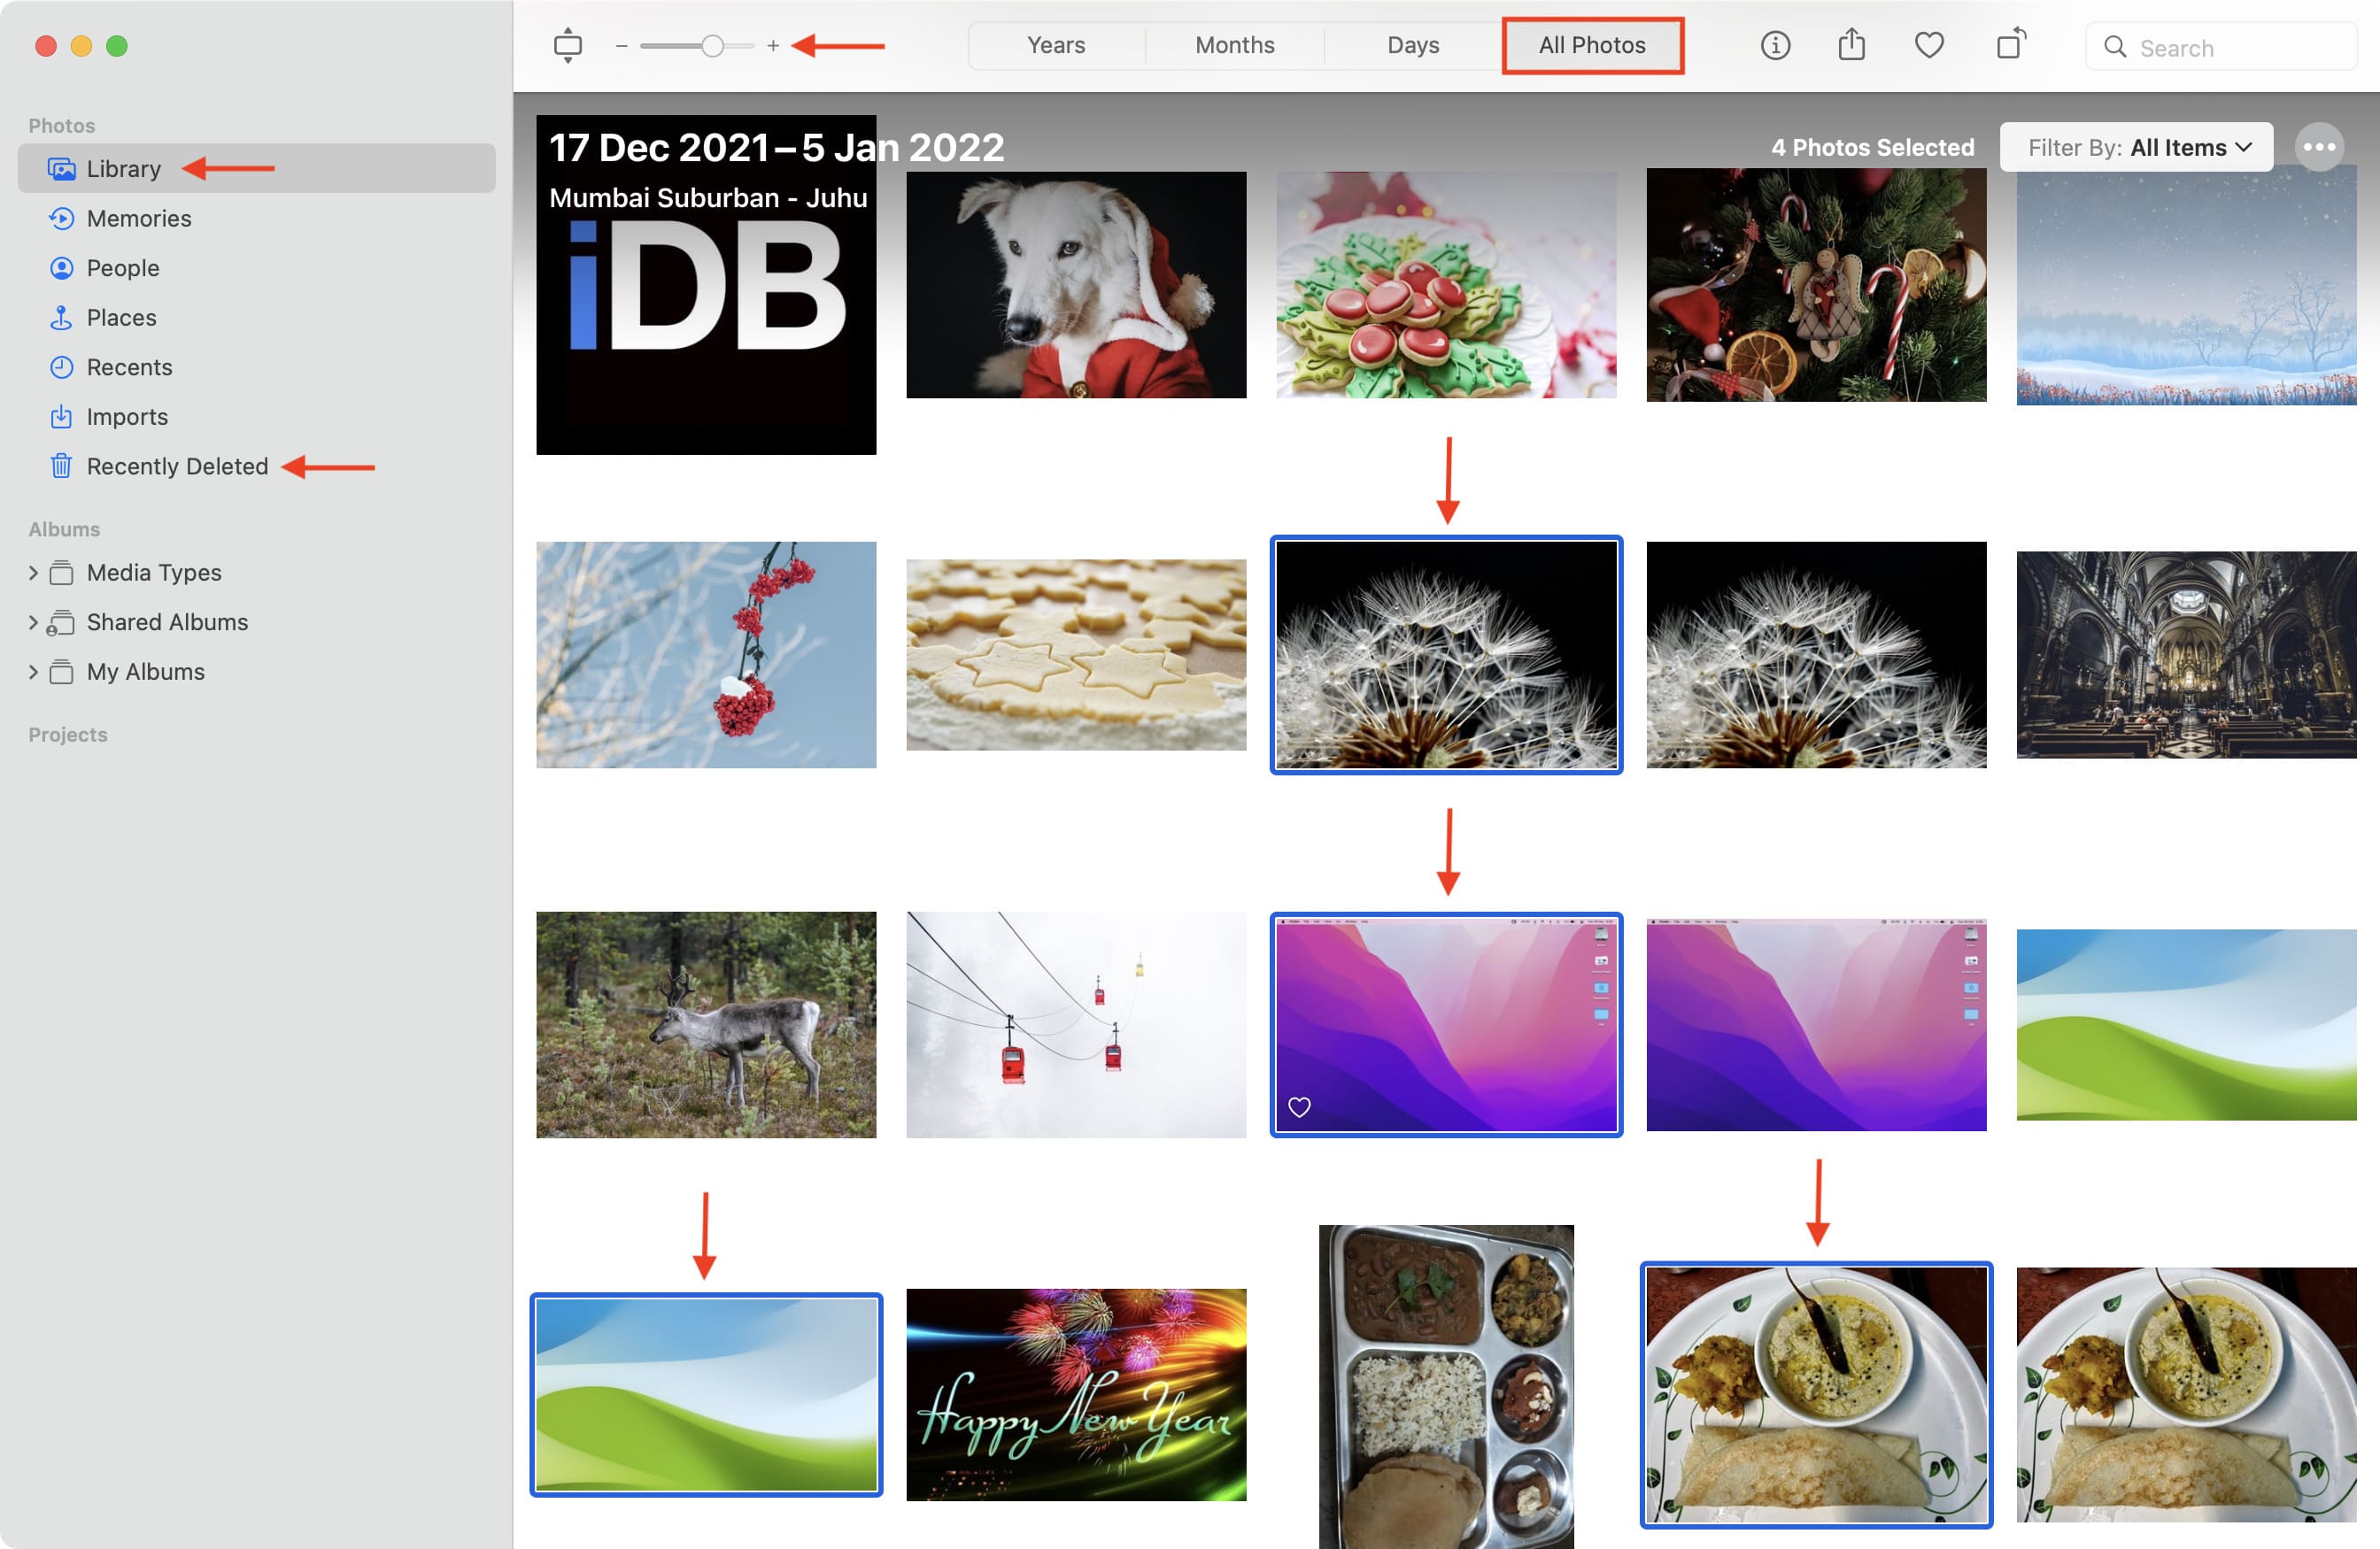
1) Open the Photos app and click Library.
2) From the All Photos tab, press and hold the Command key and manually select the duplicate images.
Tip: To see more photos, press Command + Minus (-) or use the slider on the top left.
3) When you’re done selecting the duplicate images, press the Delete key on your Mac’s keyboard and confirm.
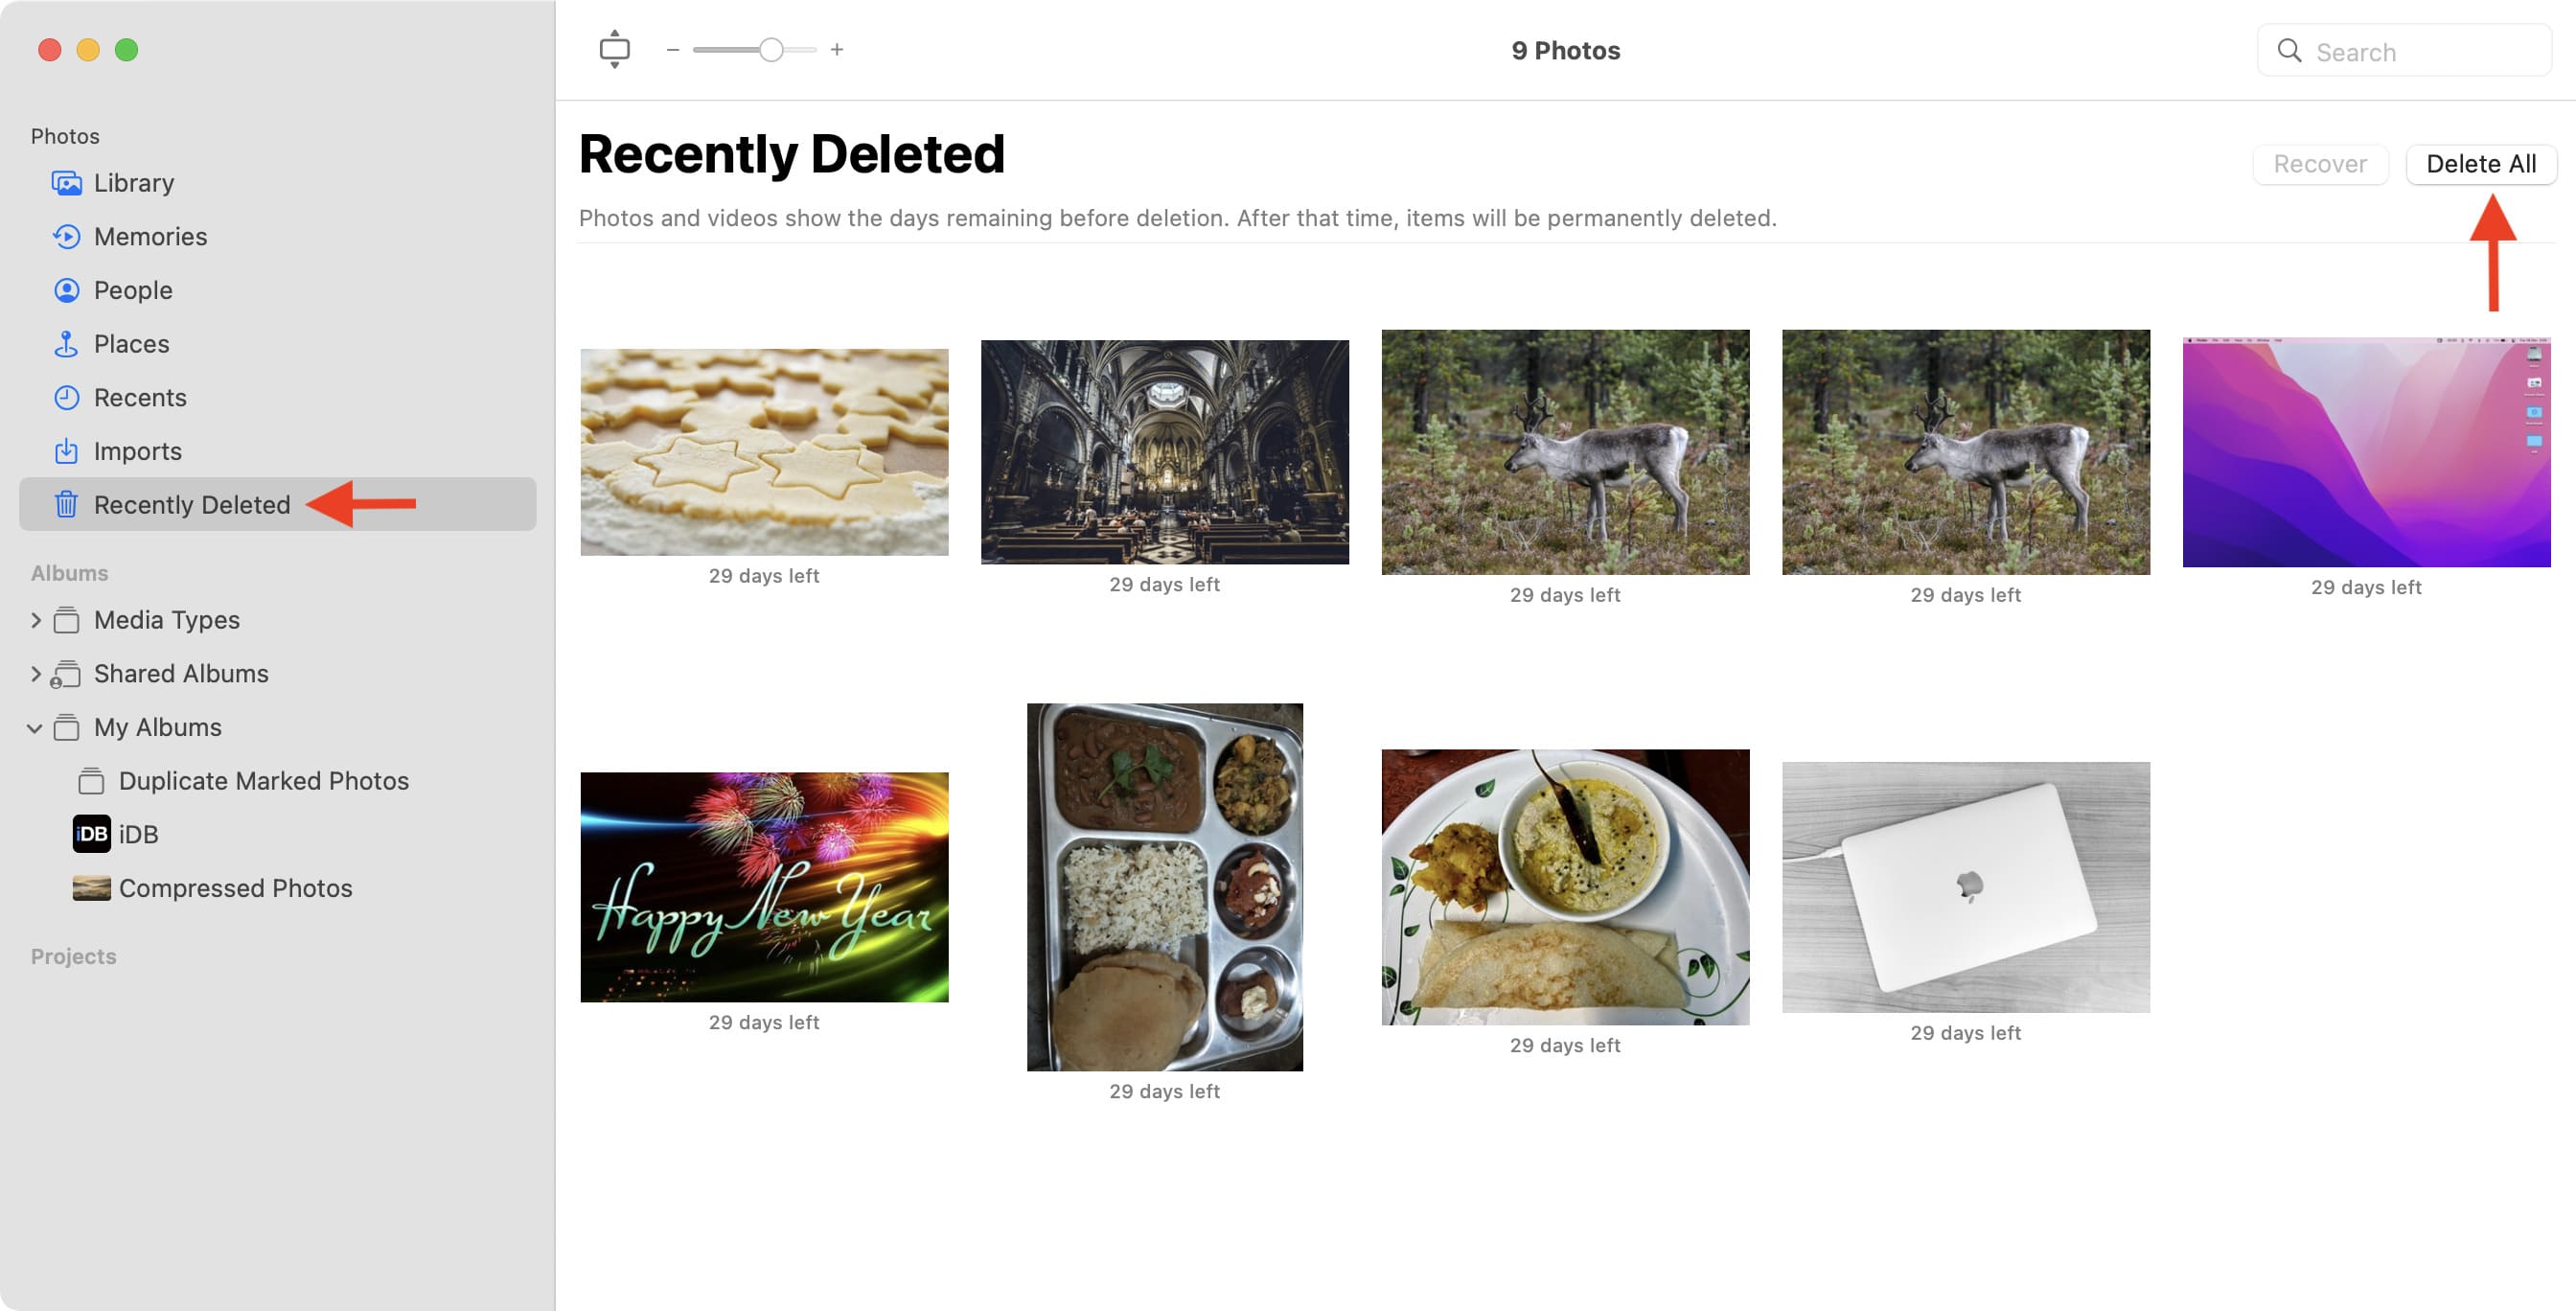
4) Click Recently Deleted from the left sidebar and click Delete All to remove all these duplicate photos permanently.
Automatically find, select, and delete all duplicate photos on Mac
The above method is doable if you have a small library of photos and you have the time to find the duplicates manually. But if you have a lot of pictures, you can use a third-party app to find and delete all the duplicate images on your Mac. Here’s how:
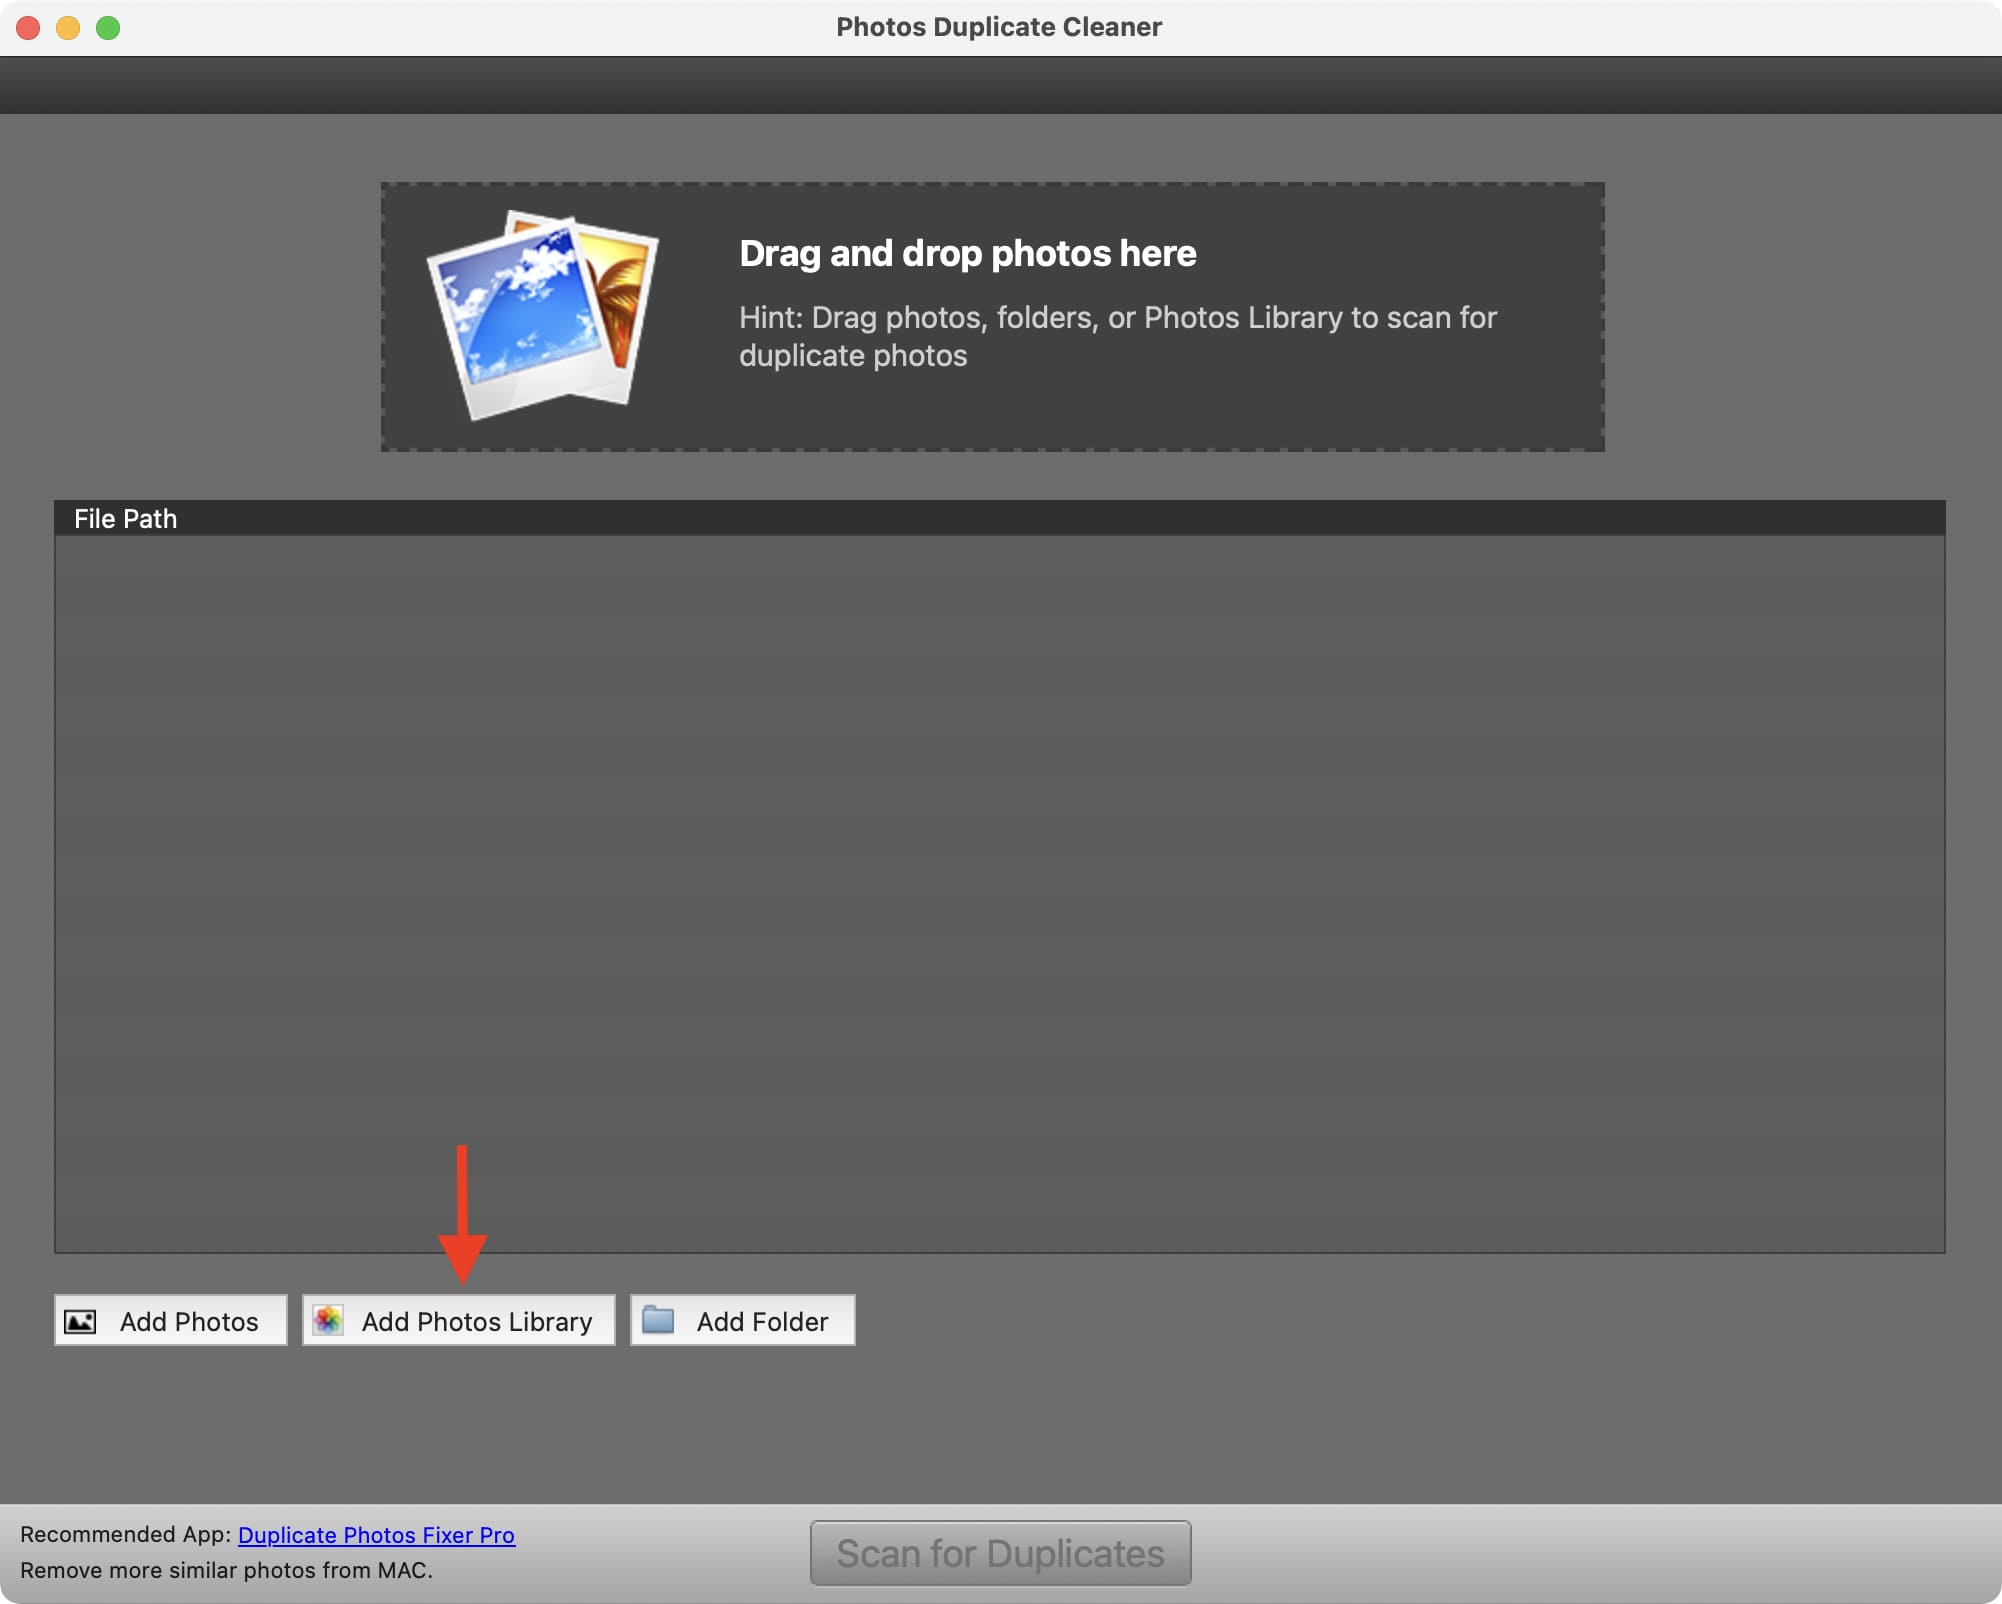
1) Download Photos Duplicate Cleaner from the Mac App Store and open it.
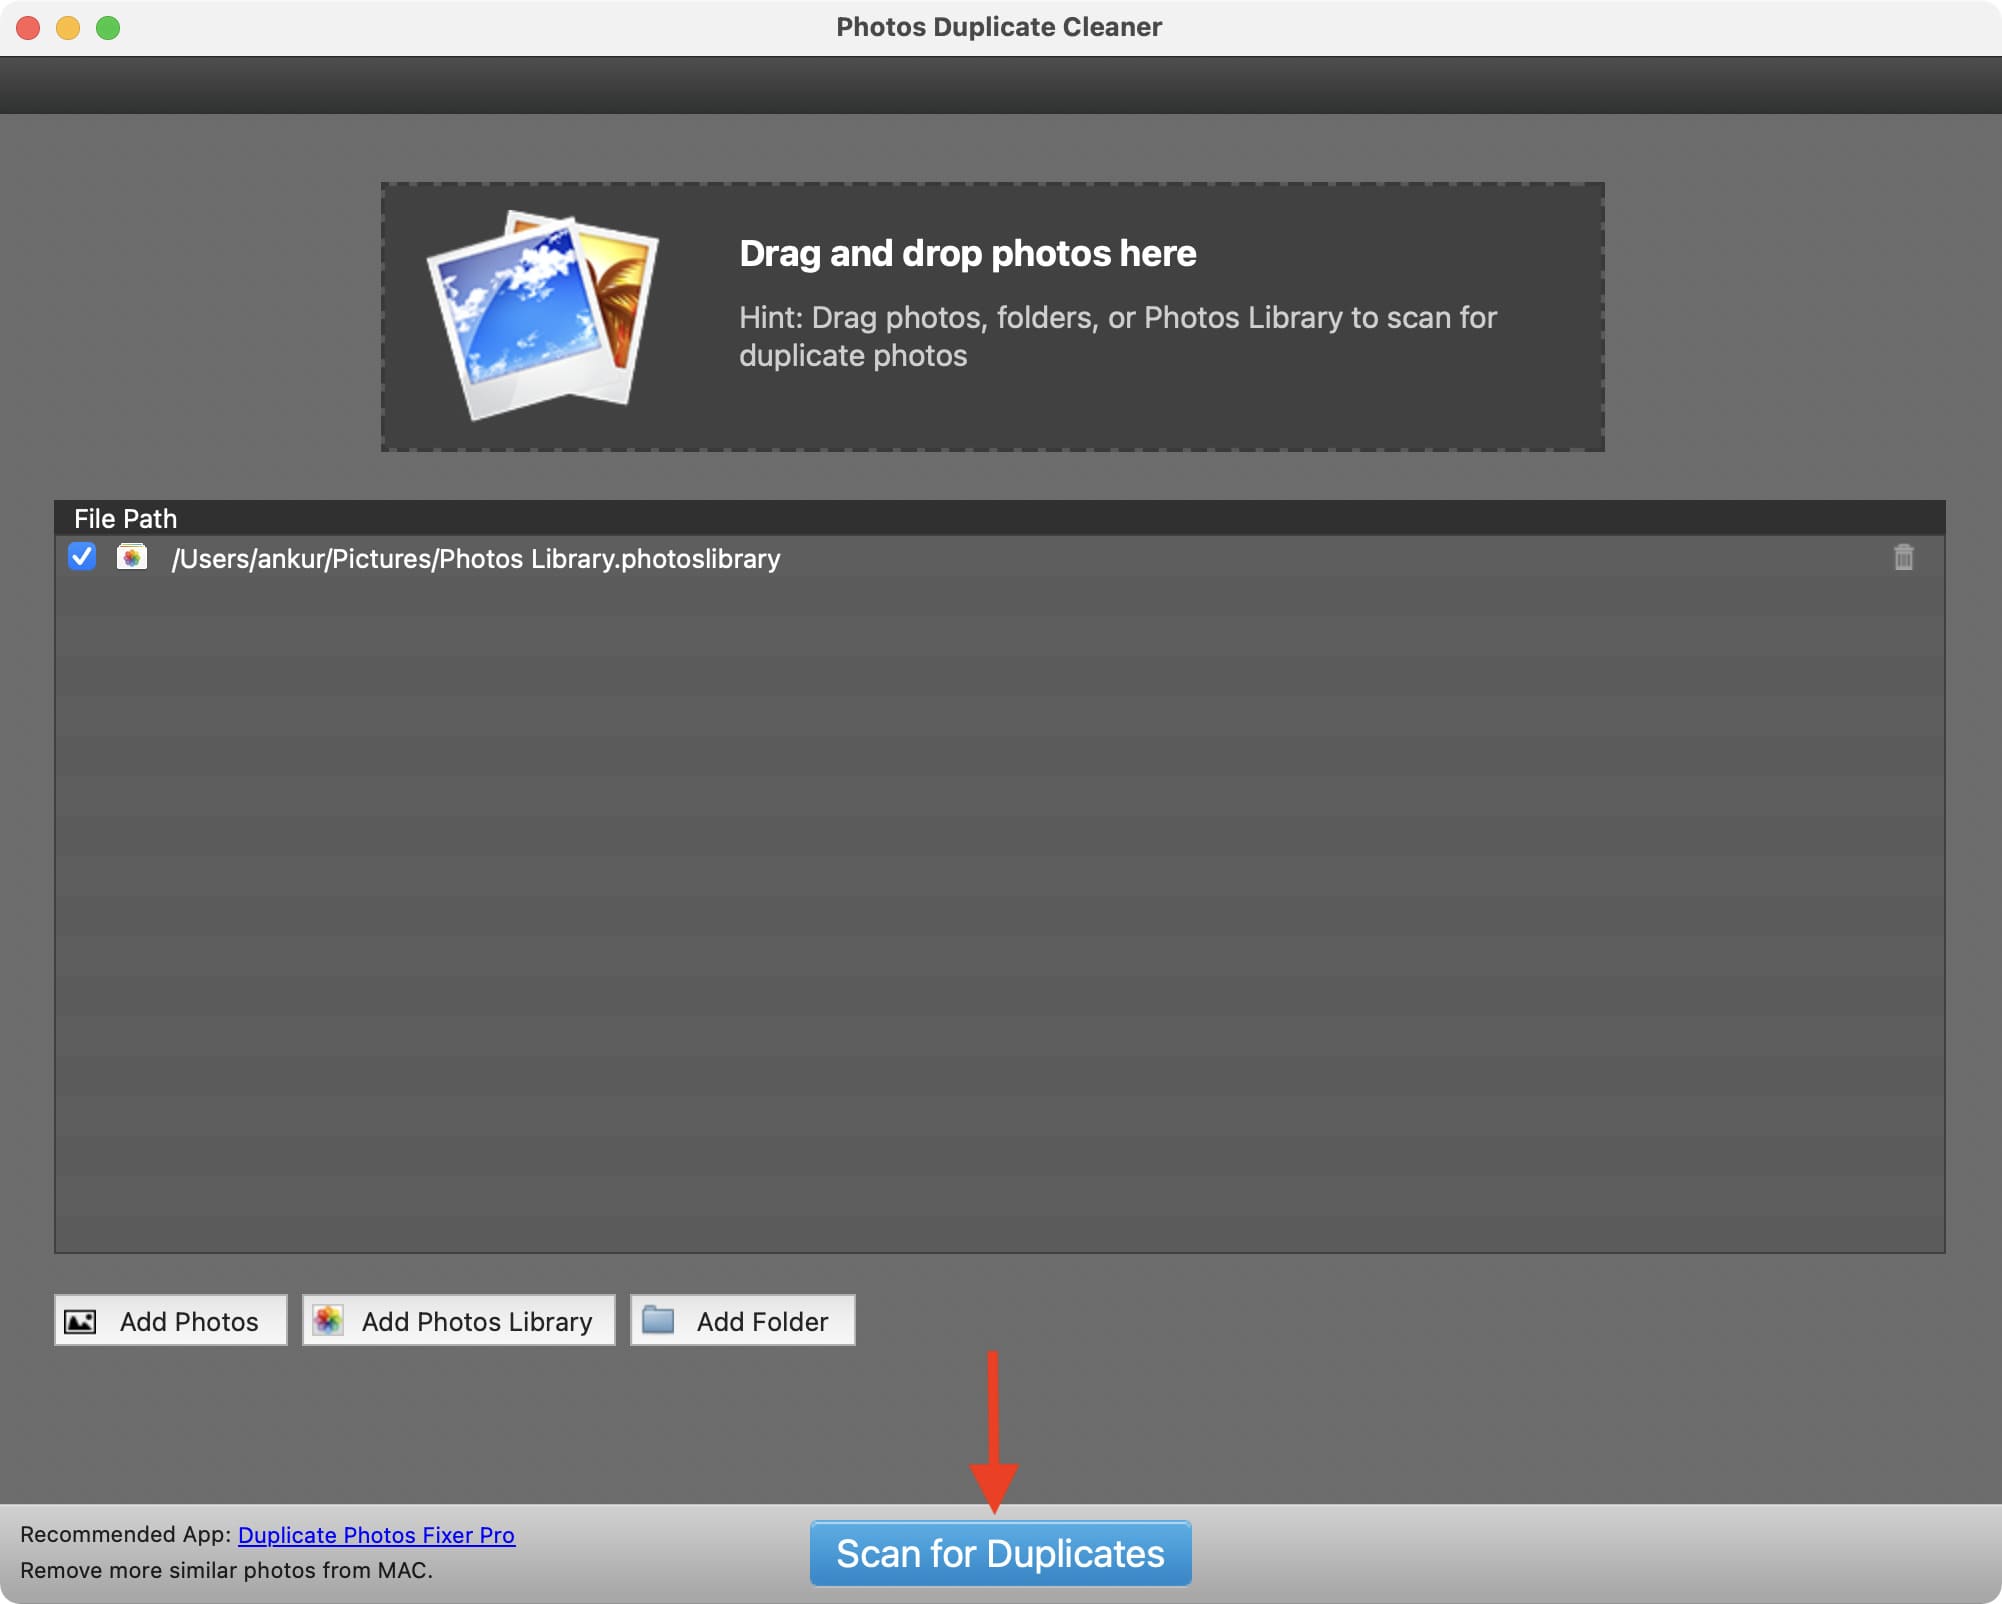
2) Click Add Photos Library and allow the app to access your photos when prompted. If you want to find and delete duplicate images from a Finder folder, click Add Folder.
3) Select Photos Library and click Add Photos Library.
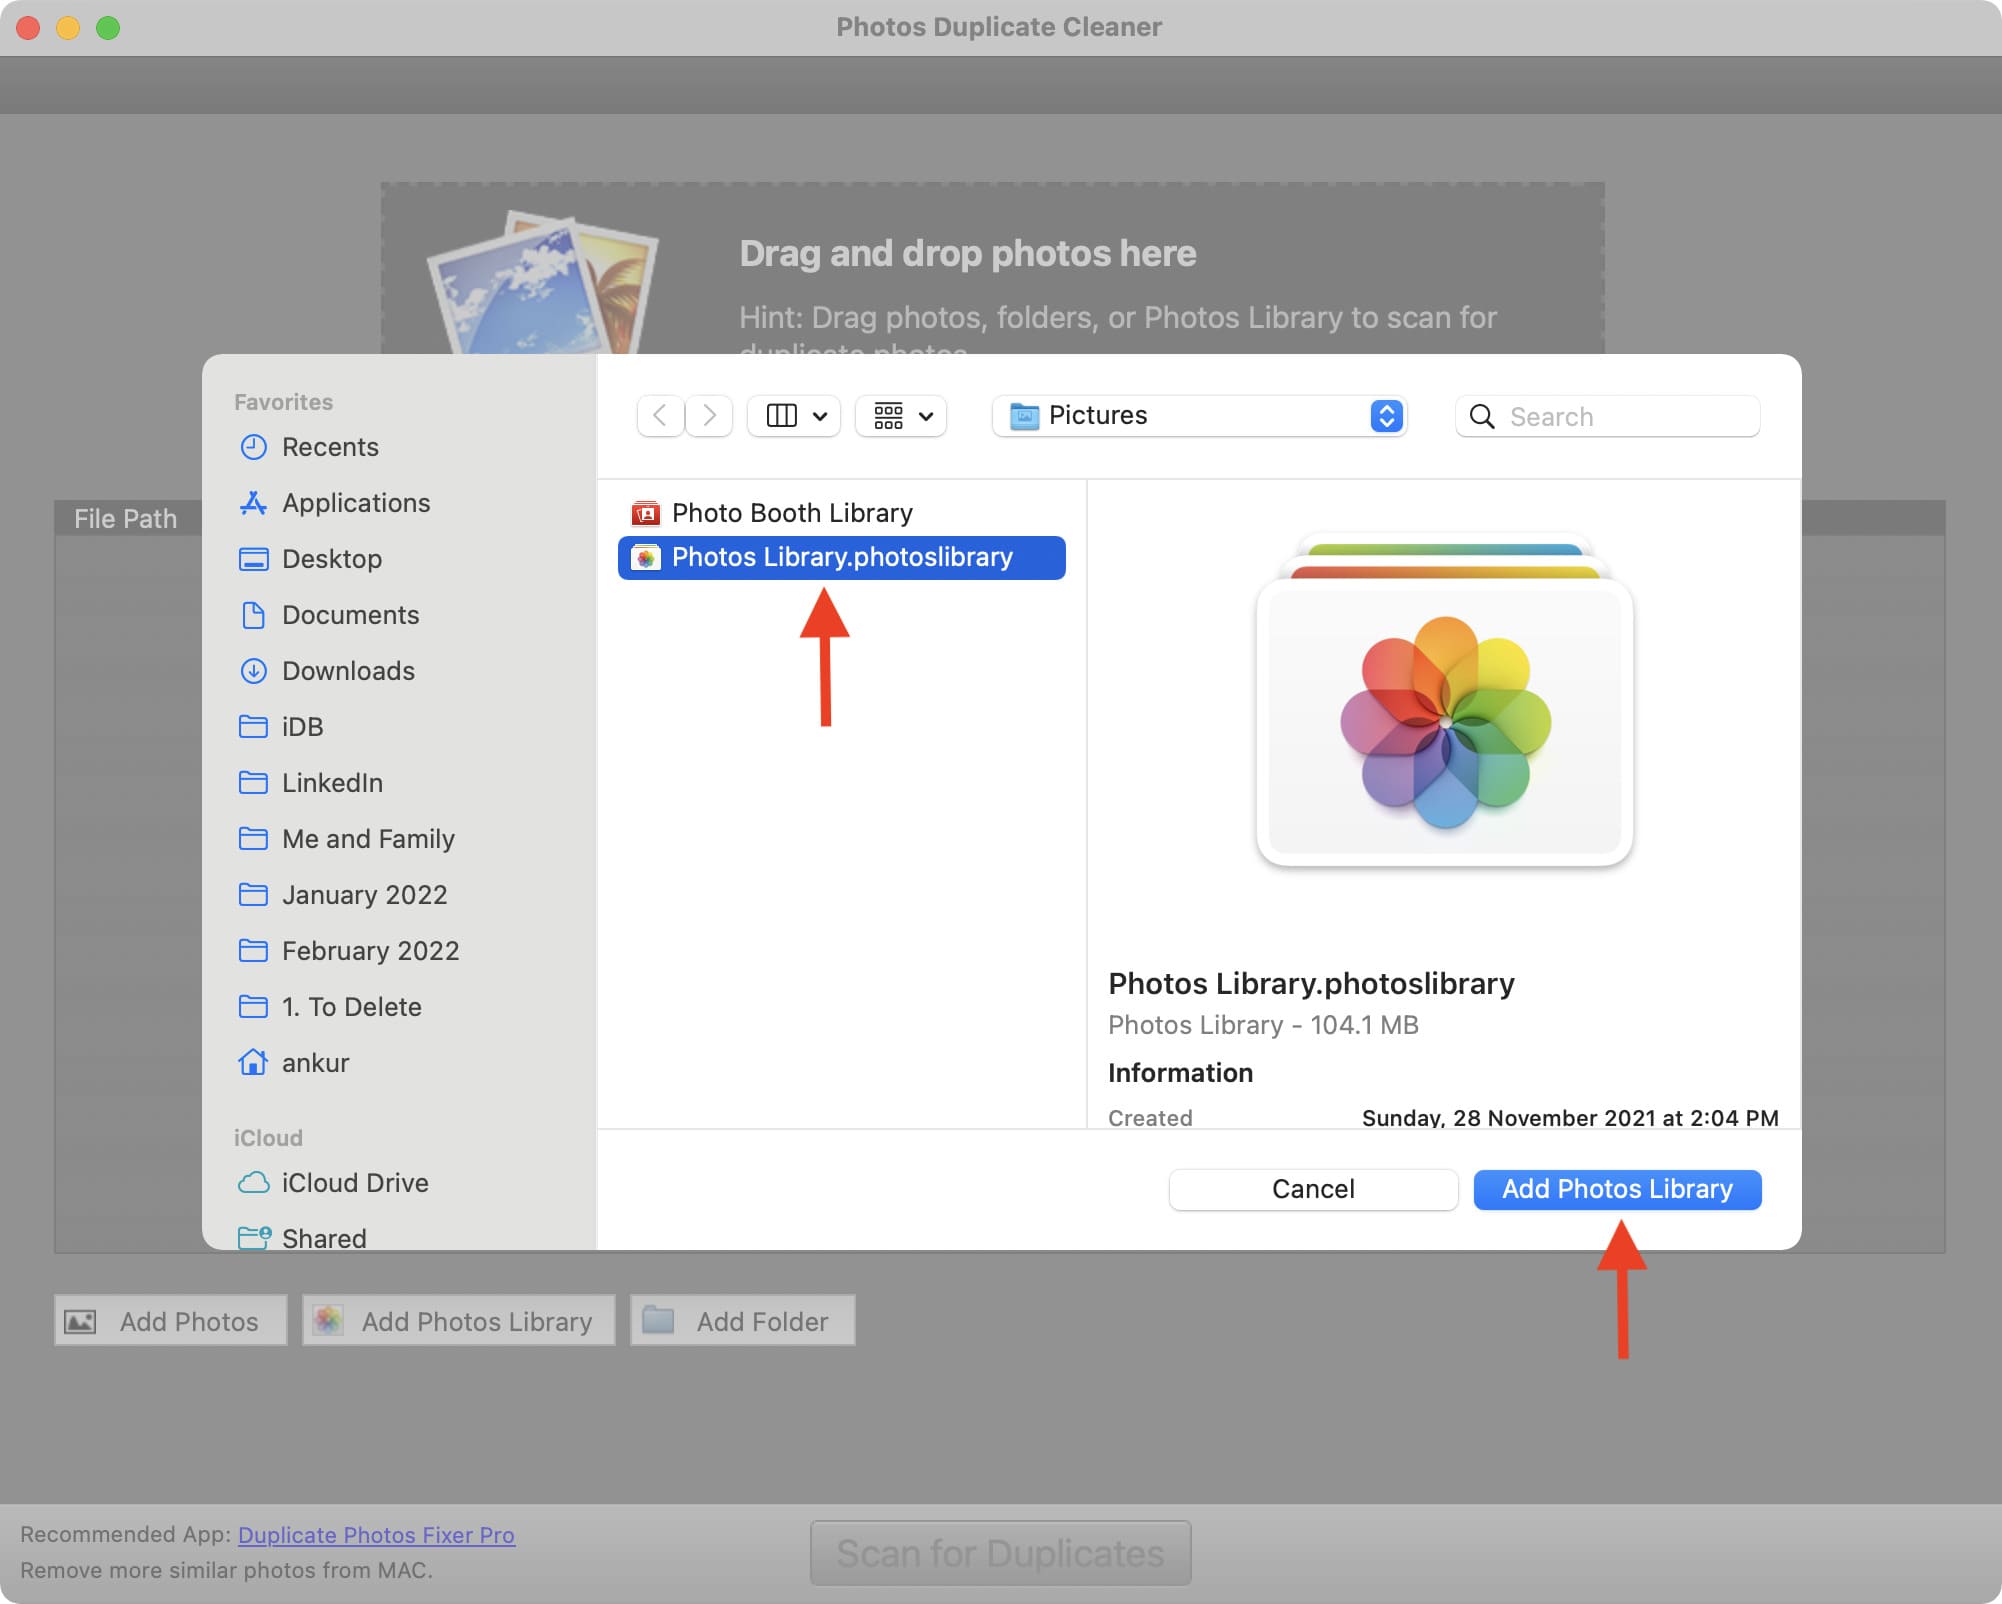
4) Click Scan for Duplicates.
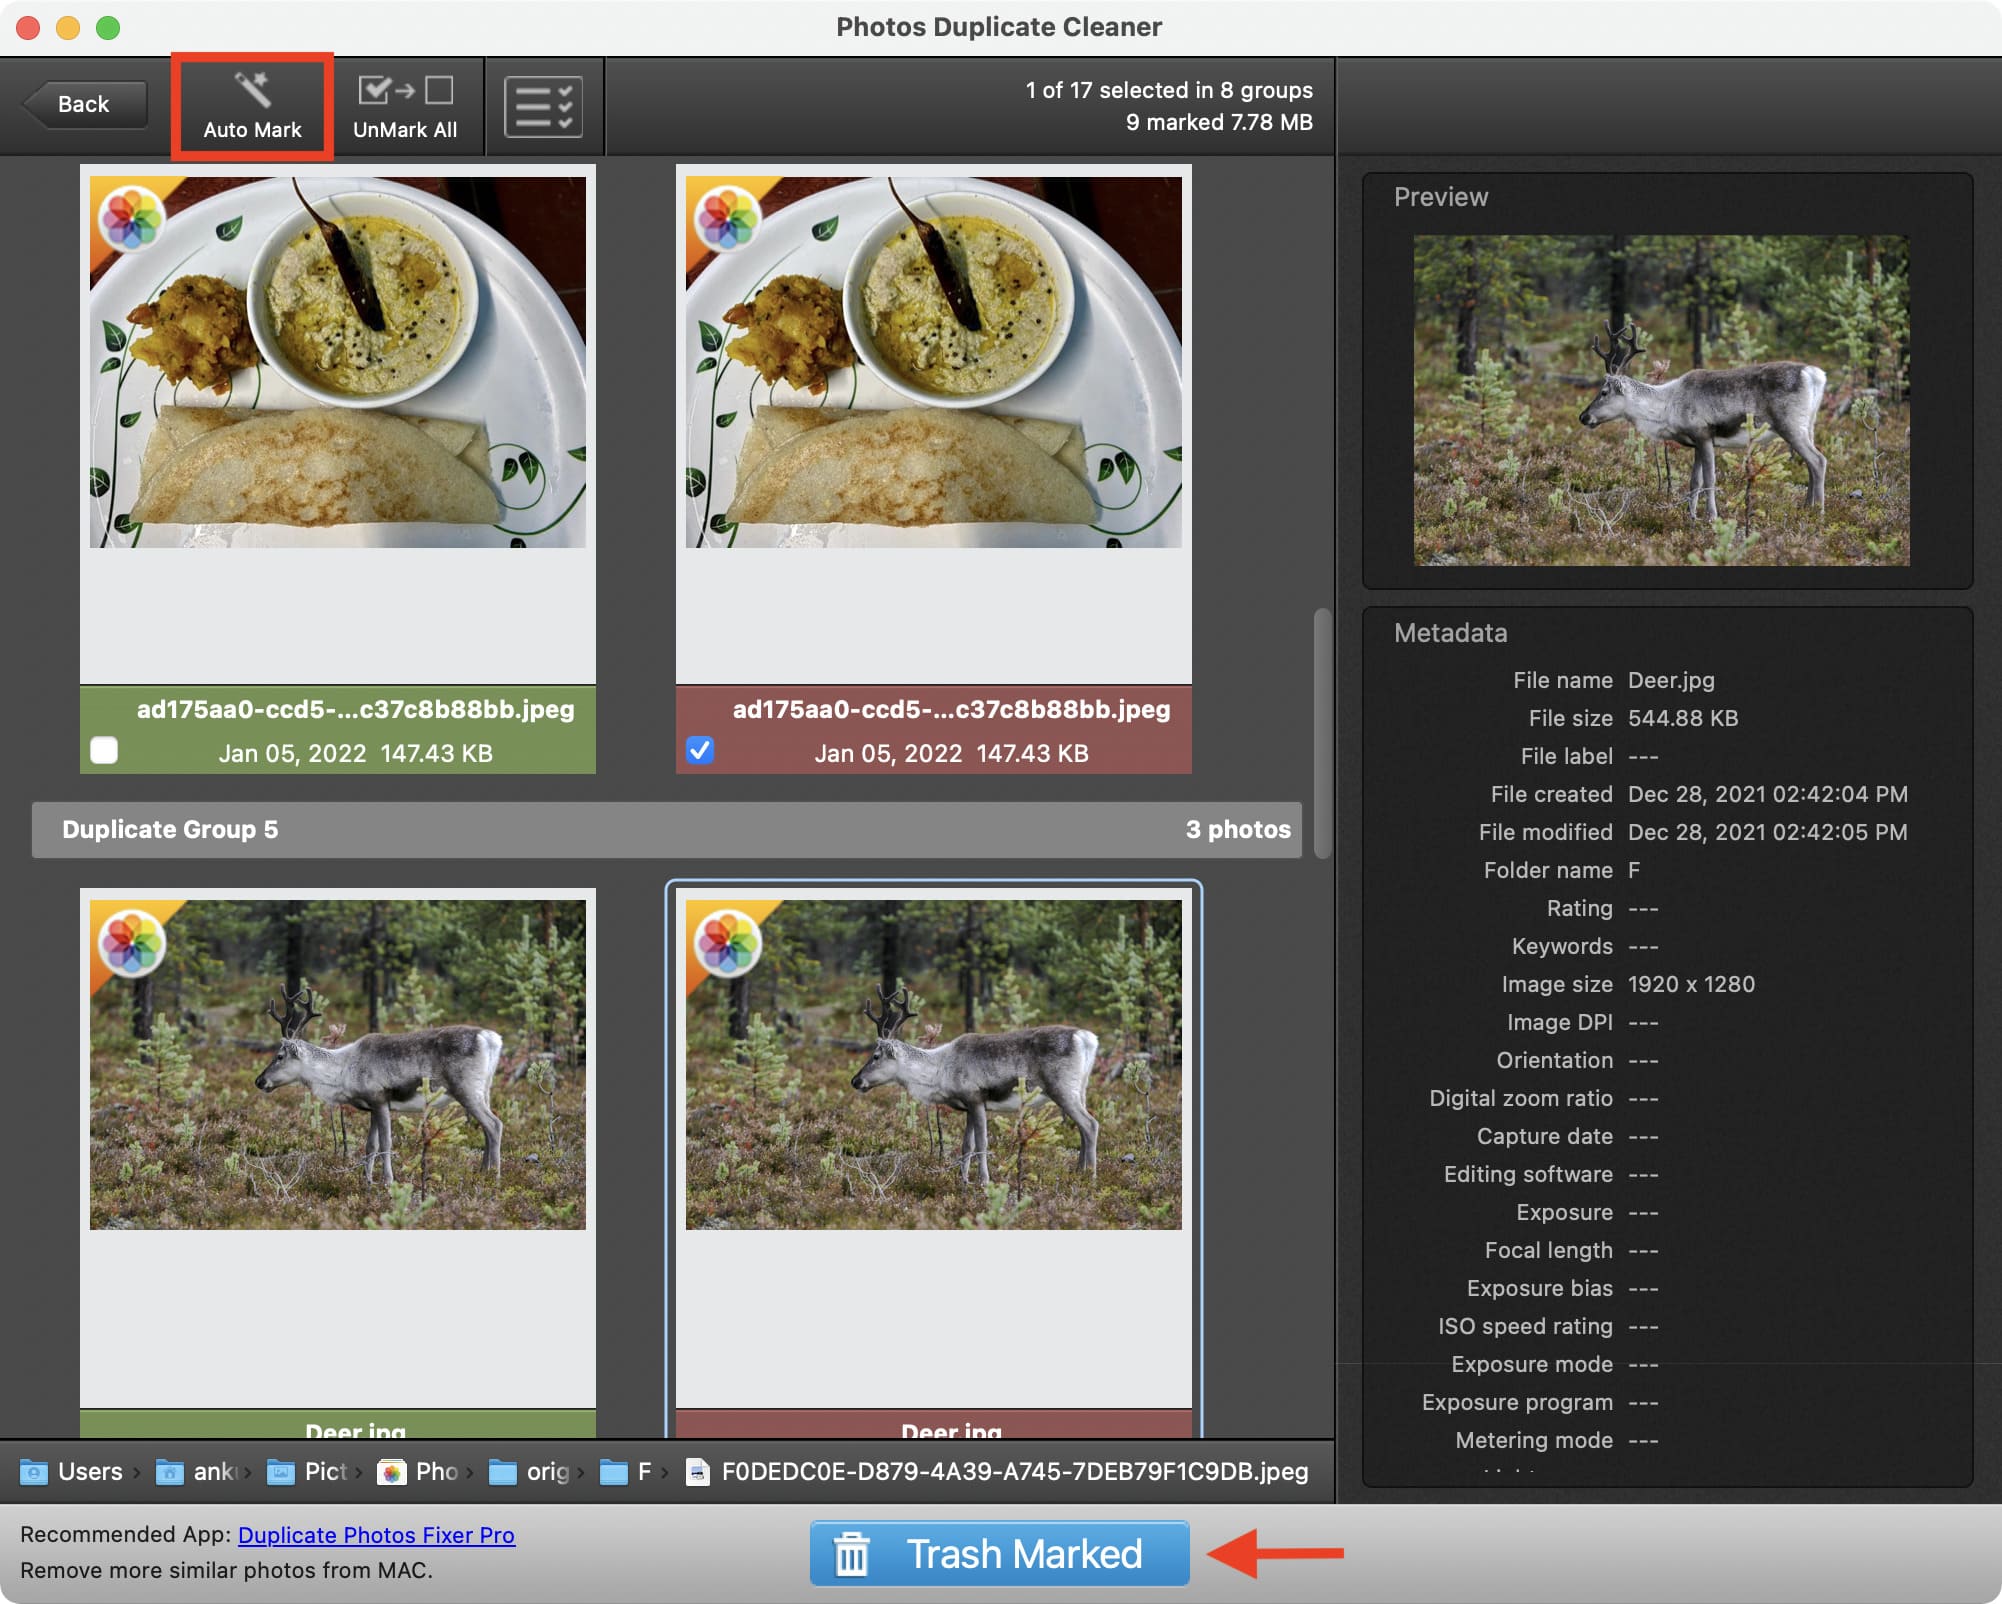
5) The app will scan all the duplicate images in your photo library and show them to you as groups. You can scroll and manually check the tiny box to select identical images. Make sure you leave one copy unchecked. But if you want to make things quicker and skip the manual checks, click Auto Mark > Continue from the top left. This will automatically select all duplicate files leaving one of their copies unchecked.
6) Scroll down the duplicate list to ensure the app has correctly selected the duplicate files. The selected ones (those that will be deleted) will have a red bottom border, and the ones that are not selected (those that will not be deleted) will have a green bottom border. Finally, when done with the manual inspection, click Trash Marked > Trash Photos.
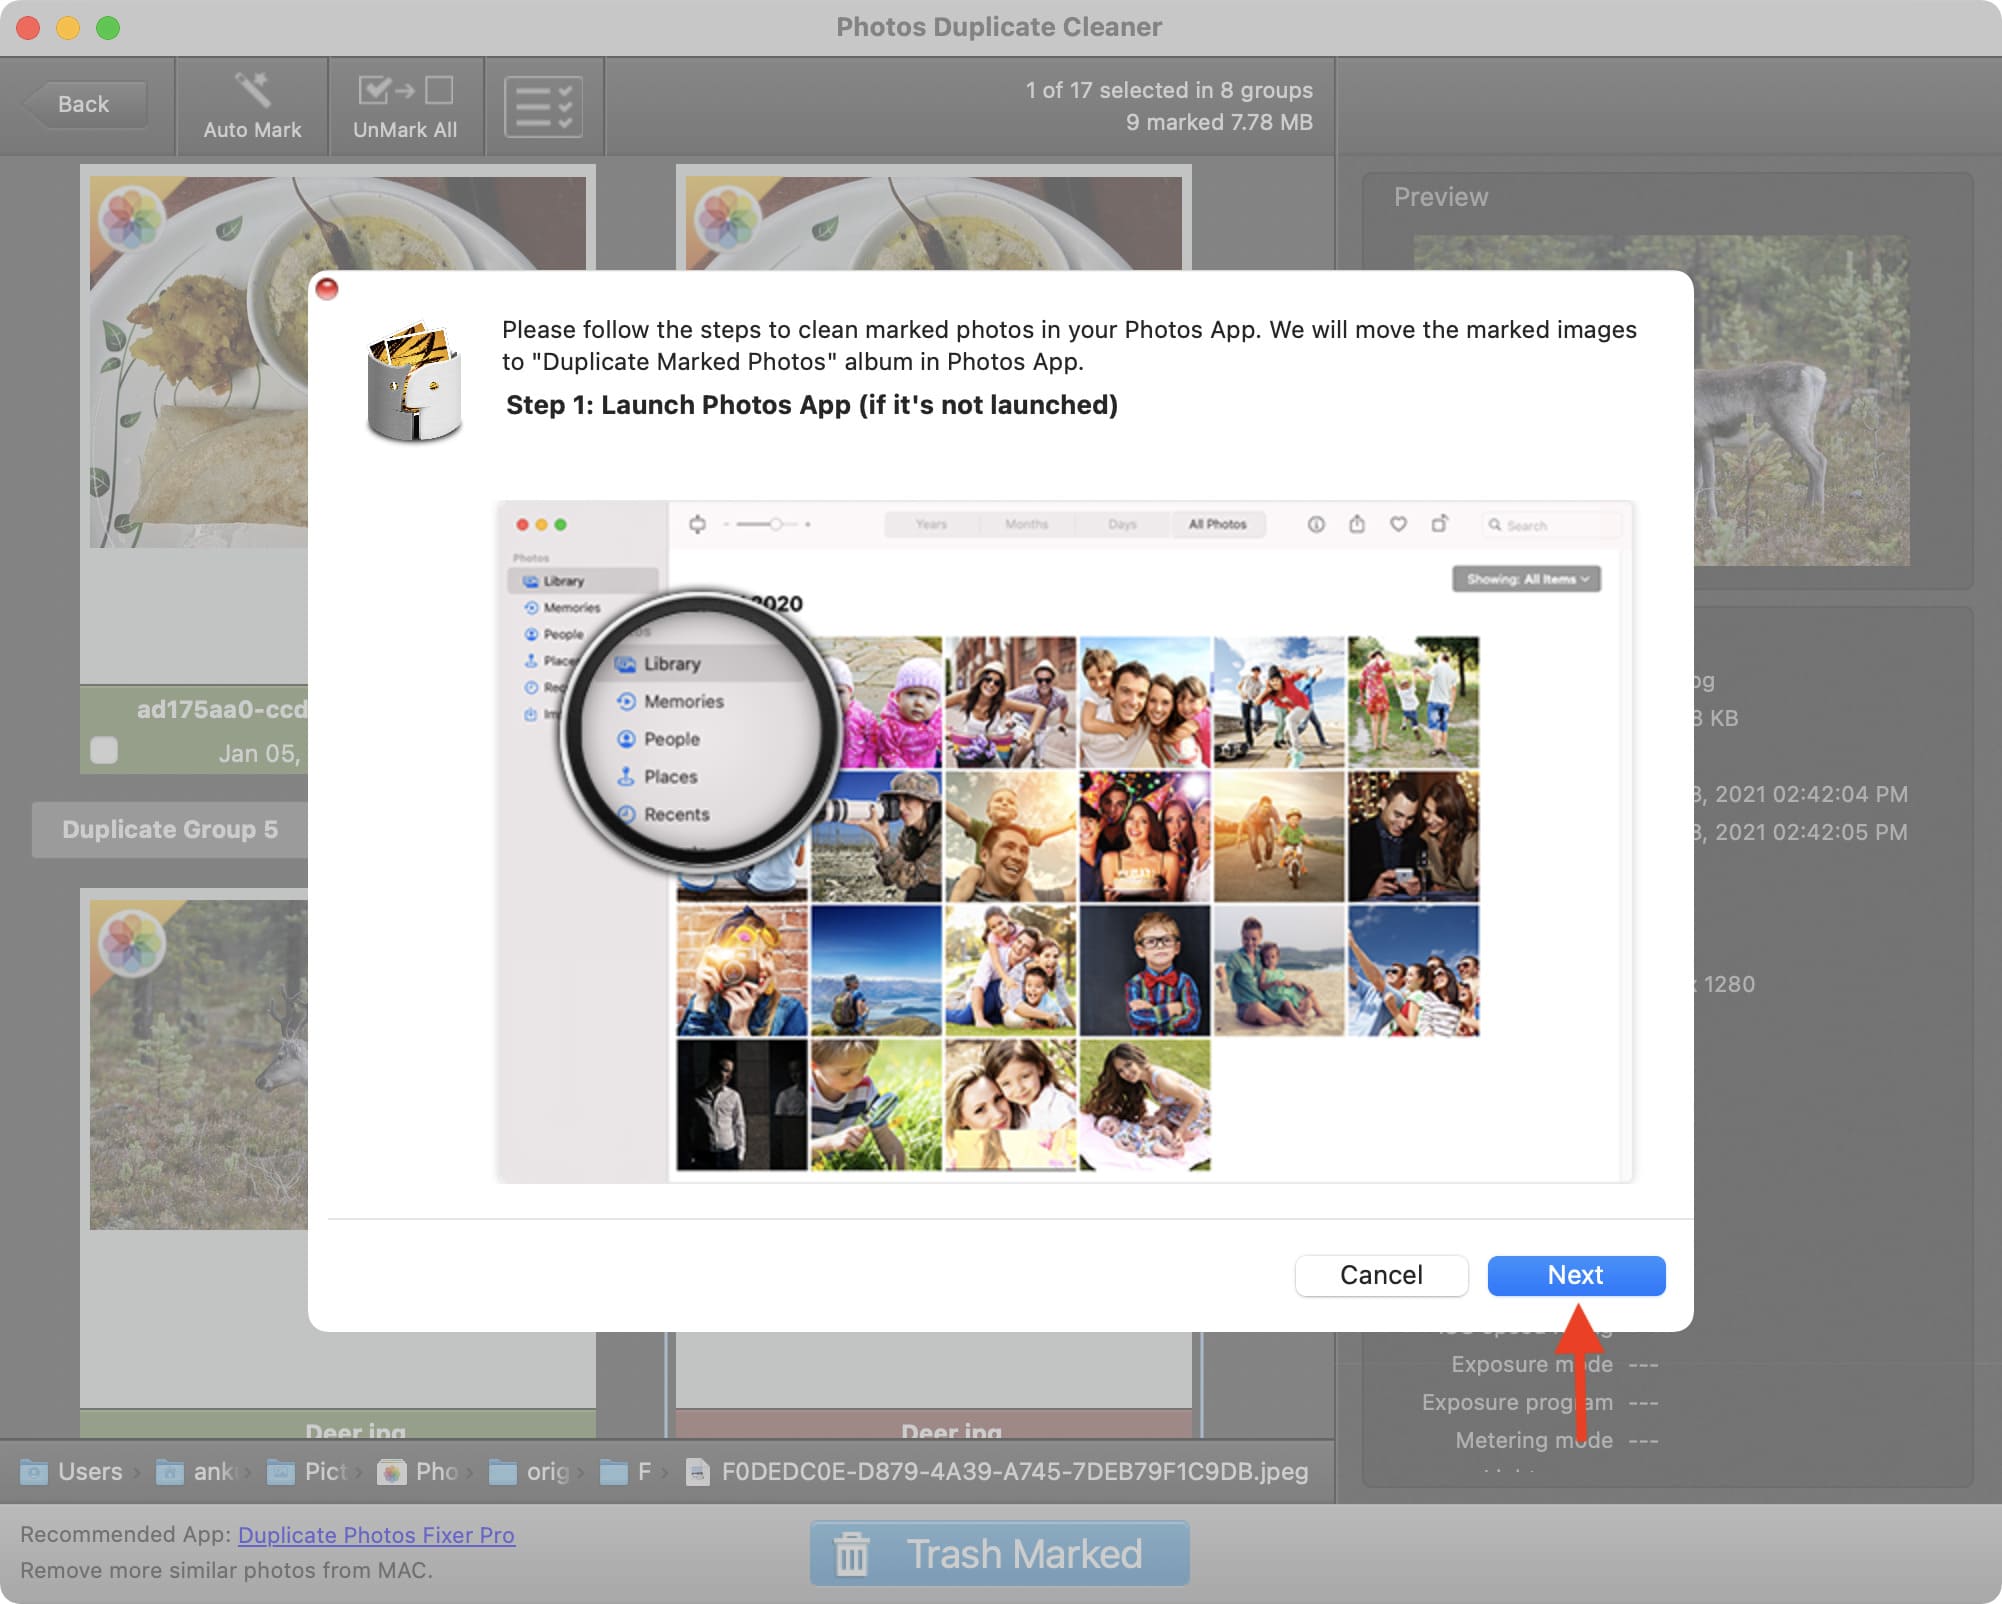
7) This should automatically open the Photos app. Ignore it for a minute and switch back to the Photos Duplicate Cleaner app. Go through the instructions by clicking Next > Next > Continue > Close. Click Ok to allow the app to access your Photos.
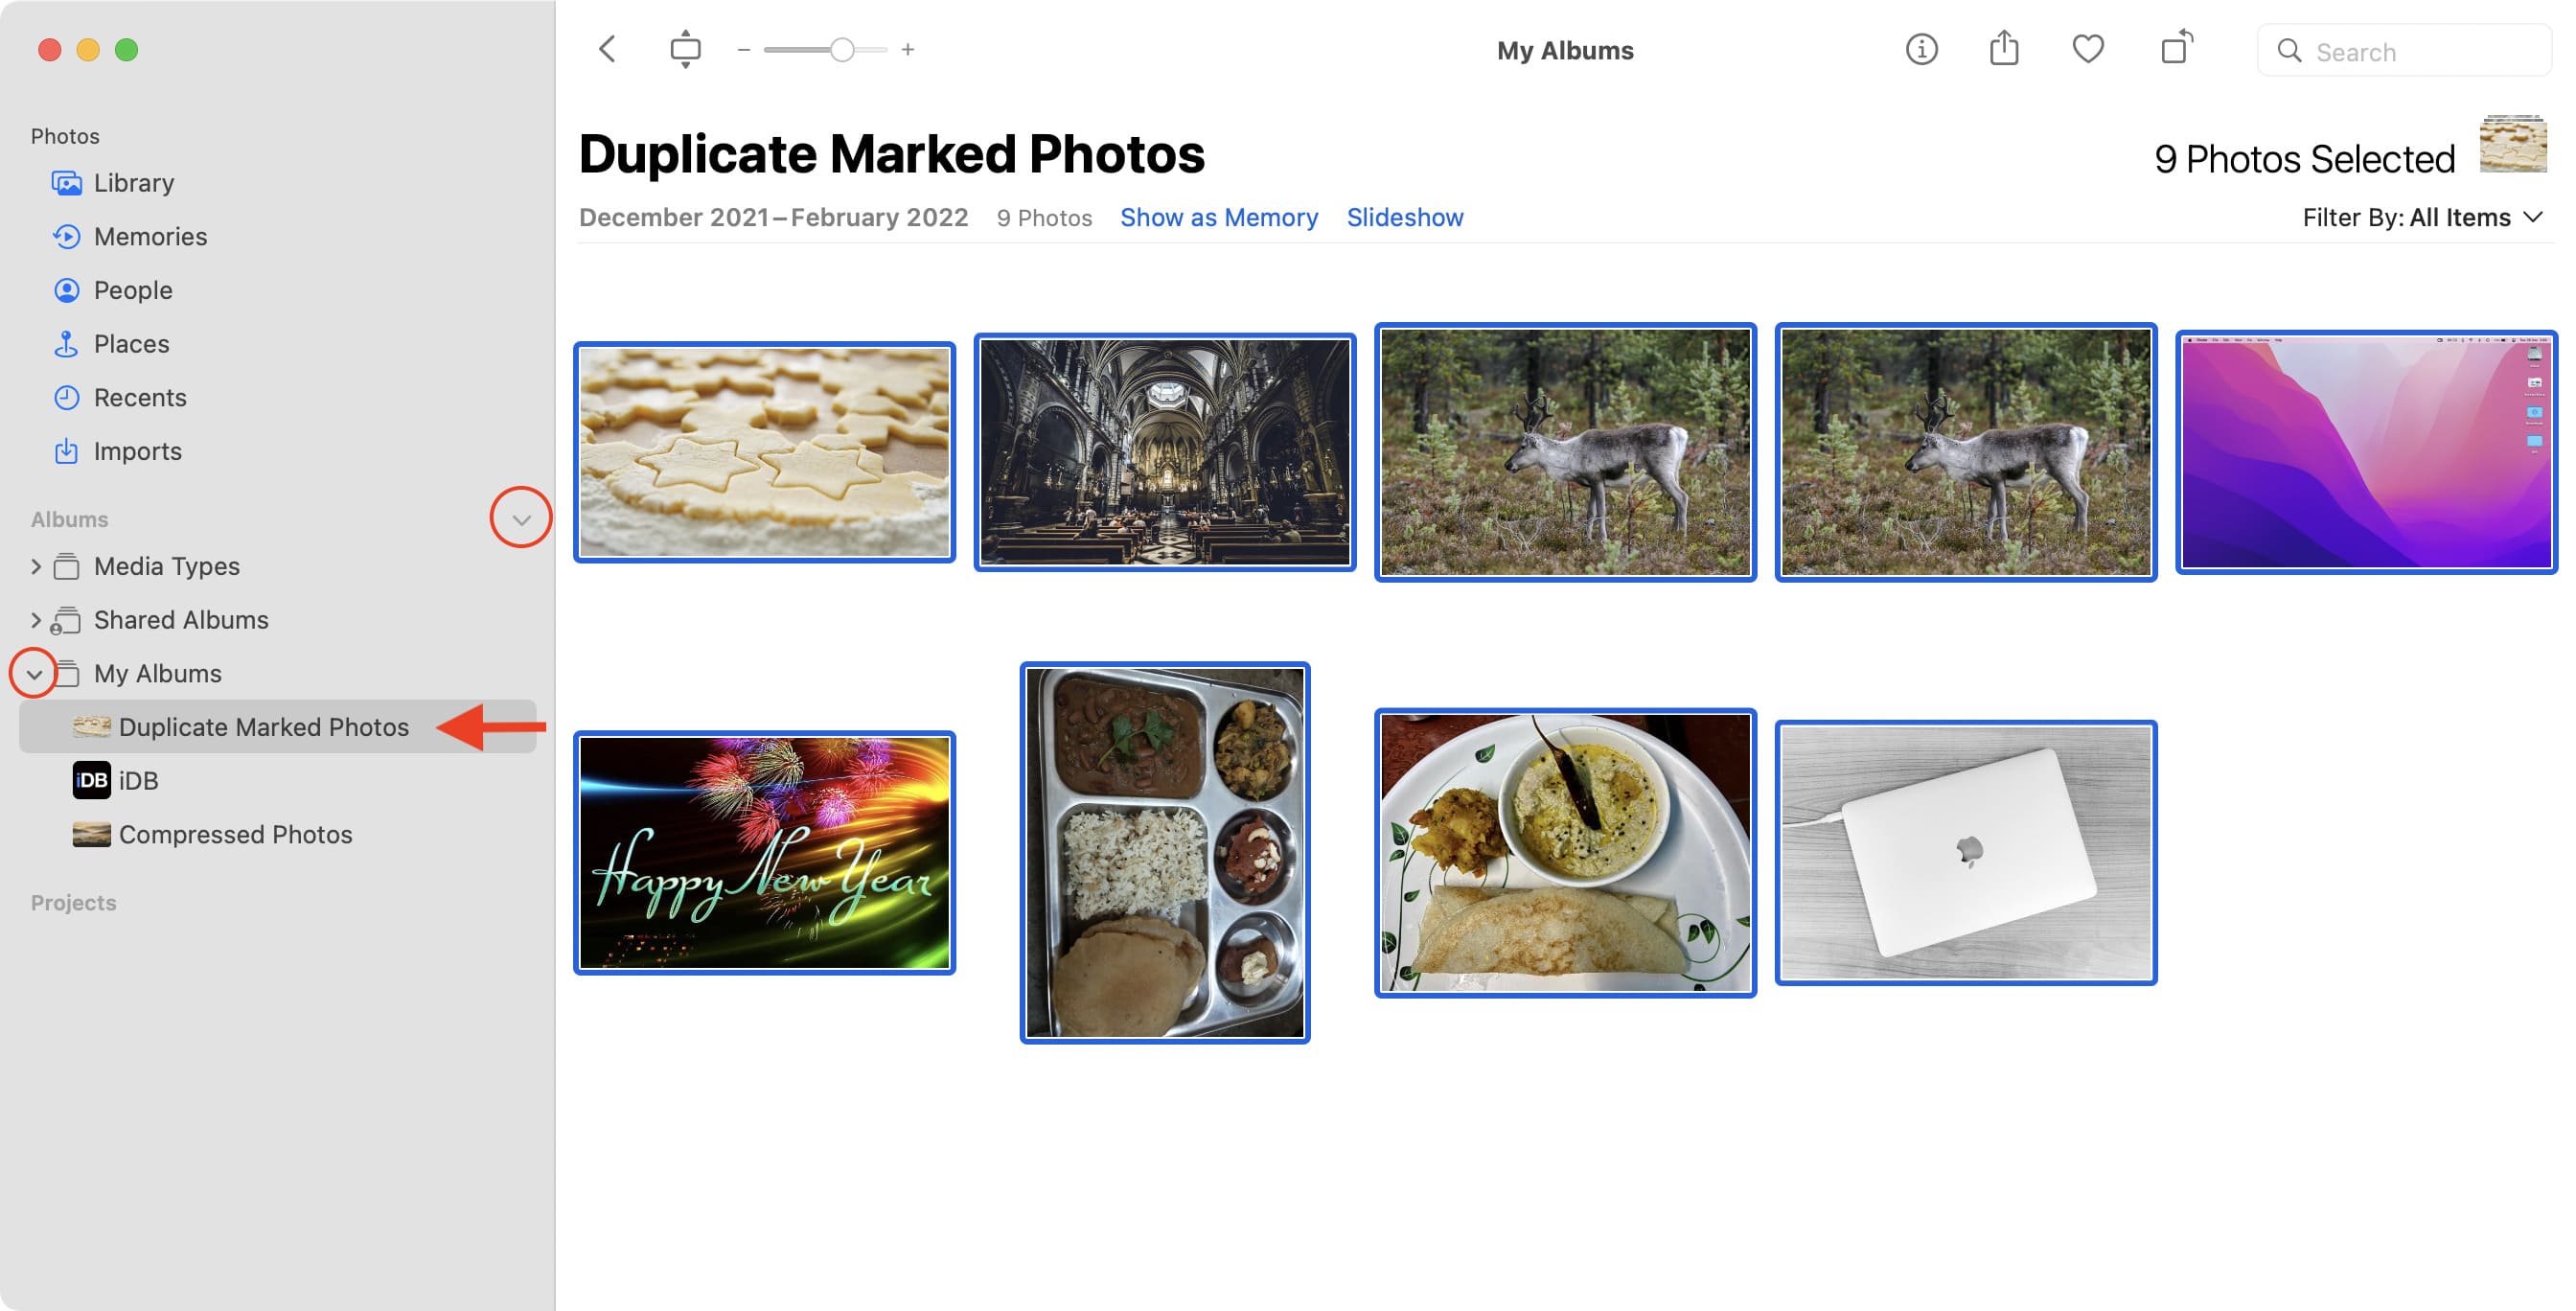
8) Now, open the Photos app and click the Duplicate Marked Photos album from the left sidebar. If you don’t see this, click the tiny arrow next to Albums and expand the My Albums section by clicking its arrow.
9) Inside the Duplicate Marked Photos album, press Command + A to select all similar photos.
10) Press Command + Delete keys to delete all images.
11) Finally, click Recently Deleted from the left sidebar and click Delete All to get rid of the duplicate images on Mac!
Read next: