
If you have a kid, you know the internet can be a wild place for them to hang around. I’ve experienced first hand when my two year old daughter was casually watching cartoons on YouTube and ended up watching a guy shout in Russian while shooting an assault rifle.
iTunes, to a lesser extend, can be a similar place. Apps, books, movies, TV shows and podcasts can contain material that could be shocking to a younger audience. Thankfully, there is some simple things you can do to set up iTunes parental control. In this post we’re going to show you how.
Setting up iTunes parental control
Turning on parental control in iTunes is actually very quick and easy. You’ll be up and running in just a few seconds.
1) Launch iTunes and in the menu bar of your Mac, go to iTunes > Preferences > Restrictions.
2) From there, you can choose to disable podcasts, internet radio, the iTunes Store altogether, or shared libraries. Simply check the boxes of the categories you want to disable. You can also restrict movies, TV shows, apps, books and music based on their ratings. Once again, you can tweak these settings to your liking by checking boxes and adjusting certain dropdown menus.
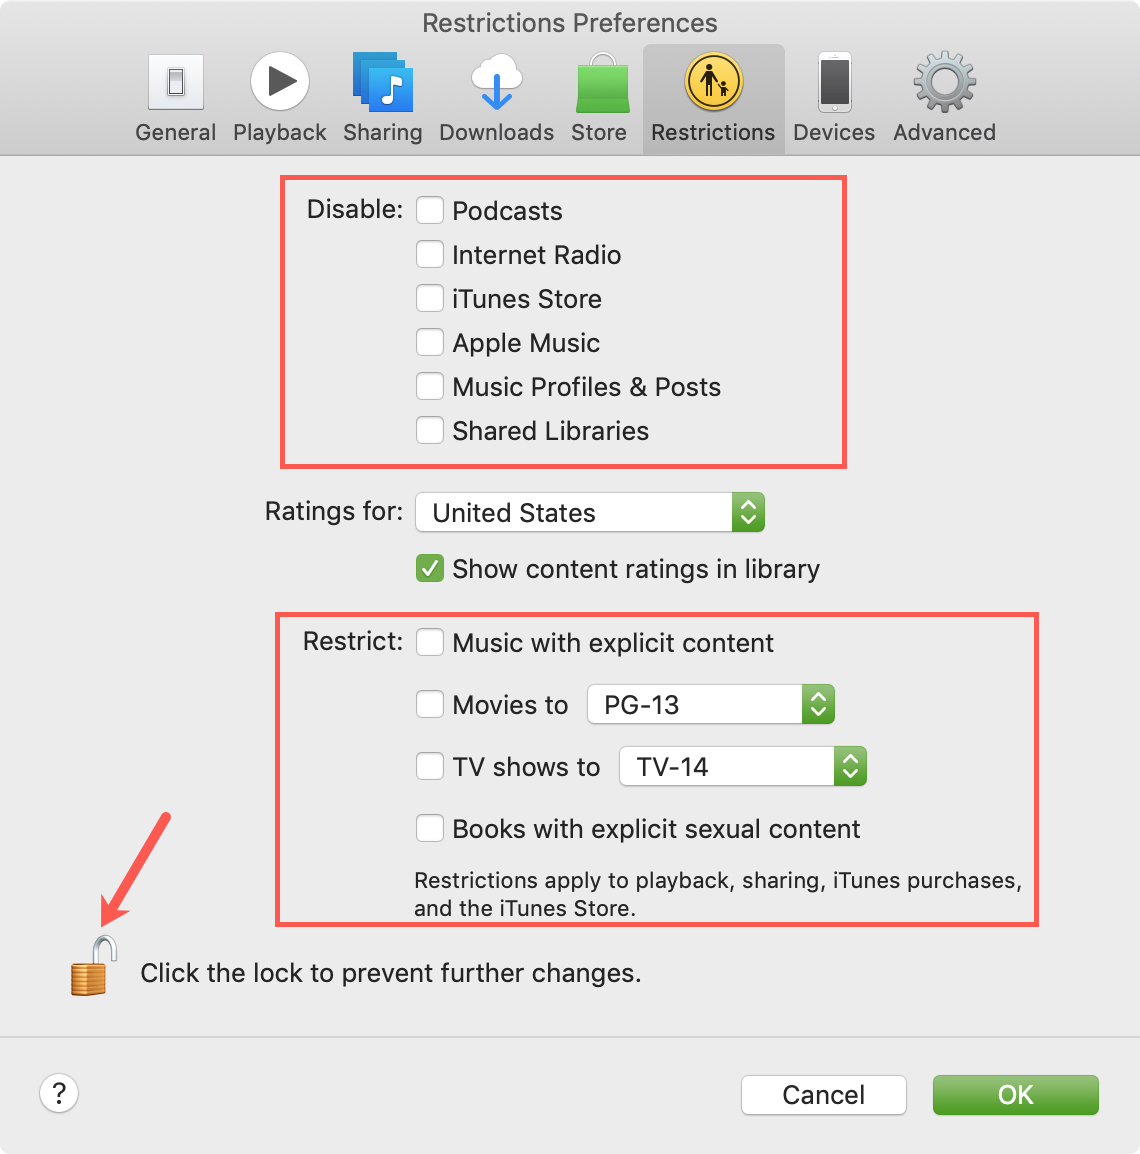
3) To make sure your kids don’t go back in the settings to change the parental controls you’ve put in place, make sure to click on the small lock icon and enter your admin password.
Your kids will now have limited access to certain content. iTunes parental control can be adjusted or turned off at any time following the same directions as outlined above.