For those of you who own an Apple TV2 and have been looking to jailbreak it, the time has arrived. Although the ATV2 has been hacked before, this is the first official solution available for those who have the latest iOS 4.3 software.
Even the tutorial we released last week on jailbreaking your Apple TV 4.3 with Seas0nPass wasn’t an official release. It was extremely buggy and required you to connect your ATV2 to your computer every time it restarted.
Well, thanks to the hard work of the Dev Team, Saurik and NitoTV, we finally have an official jailbreak solution for iOS 4.3. So for those interested in hacking their Apple TVs and adding tons of extra capabilities to that little black box, let’s get started.
Important Note: This is only for 2nd generation Apple TVs, the black one. Also this particular tutorial is only for Mac users, as it uses PwnageTool which is currently only available for Mac OS.
Before we start hacking, you want to make sure your Apple TV is on the latest software version. You can do this by connecting the device to a computer with iTunes or from the Apple TV main menu. Just go to Settings > General > Update Software.
Step 1: You will need a micro-USB cable. This are the most common USB cables and are typically used to charge smartphones. Also you will need the latest version of iTunes. Finally, you need PwnageTool 4.3, which can be downloaded here. I always download tools to my desktop so I can keep track of them.
Step 2: If you updated your software via the Apple TV itself, you will still need the firmware file which you can get here. If you updated through iTunes, move along to step 3.
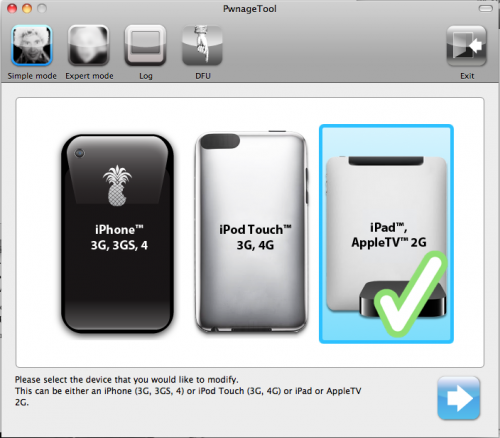
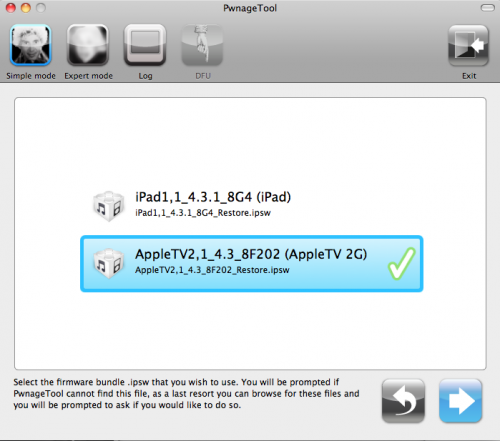
Step 3: Open up PwnageTool and select your device. Obviously for this tutorial we want the Apple TV2. Click the blue arrow and let the software find the file. When it’s done, select the Apple TV firmware file and click next.
Step 4: PwnageTool will now create a custom jailbroken file out of the firmware, so give it some time. Once it’s done working its magic, plug your Apple TV into your computer using the micro-USB cable. Make sure your power and HDMI cables are left unplugged.
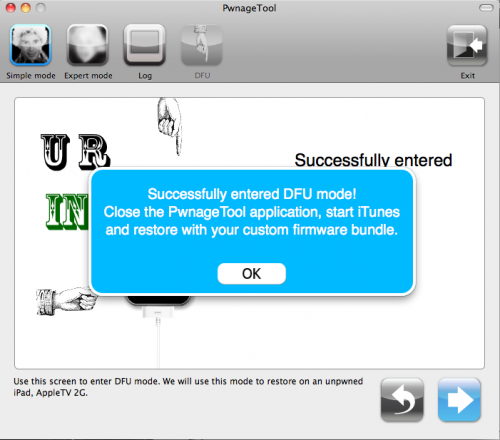
Step 5: The software will walk you through the DFU process, which will prep your Apple TV for the custom firmware. If successful, it should look like this:
Step 6: You can now close PwnageTool and open up iTunes. With your Apple TV plugged in, iTunes should immediately go to the ATV page. You’ll see a big button that says restore. While holding down your Mac’s Option key, click restore. This should launch a Finder window and allow you to choose the custom firmware, that PwnageTool made, from your desktop.
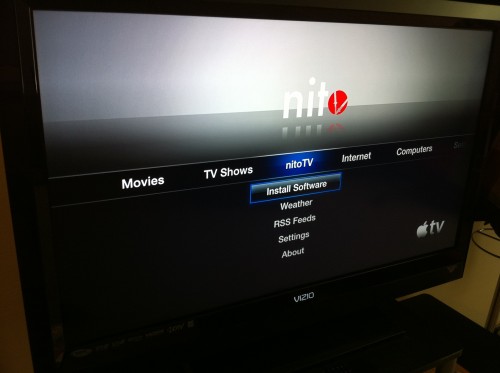
Step 7: Let iTunes do its thing and once it says completed, you’re done. Unplug your Apple TV from your computer and back into your TV set. If you see the NitoTV option in the main menu, you’re jailbroken!
From here you can begin to experiment. Stay tuned to our blog as we post more tutorials on some of the cool things you can do with your new jailbroken Apple TV, such as browse the web and even watch Hulu.


